

Step 01Download and install
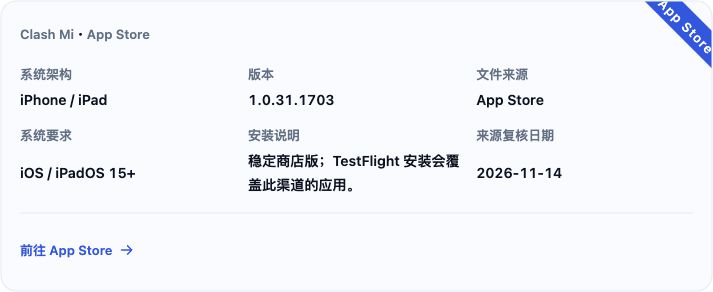
iOS / iPadOS: Open this site’s download page → App Store and install Clash Mi.
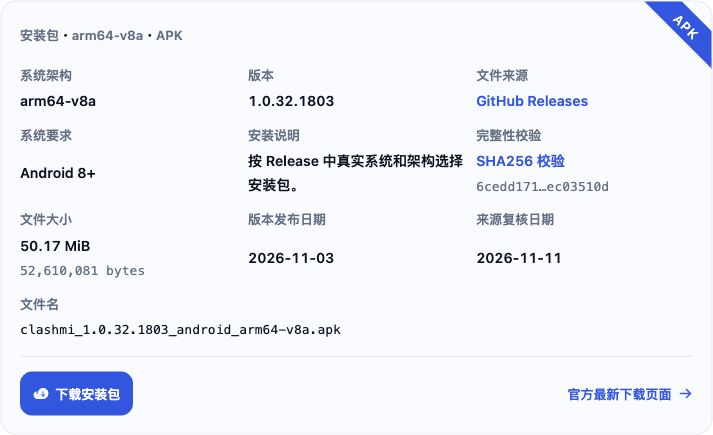
Android: Open this site’s download page and download the verified APK for your device. For other architectures, use the KaringX/clashmi official latest-release link on that page to choose arm64-v8a or armeabi-v7a. After downloading, open the APK, follow the system prompts to install it, then open Clash Mi.
Android installation note: Open the downloaded APK. If a prompt blocks installation from this source, tap 设置 (Settings).
Enable 允许安装应用 (Allow app installs; some systems call it Allow from this source) for the browser or file manager opening the APK. Return to the installer, tap 安装 (Install), then tap 打开 (Open) when it finishes.
Step 02Get a subscription
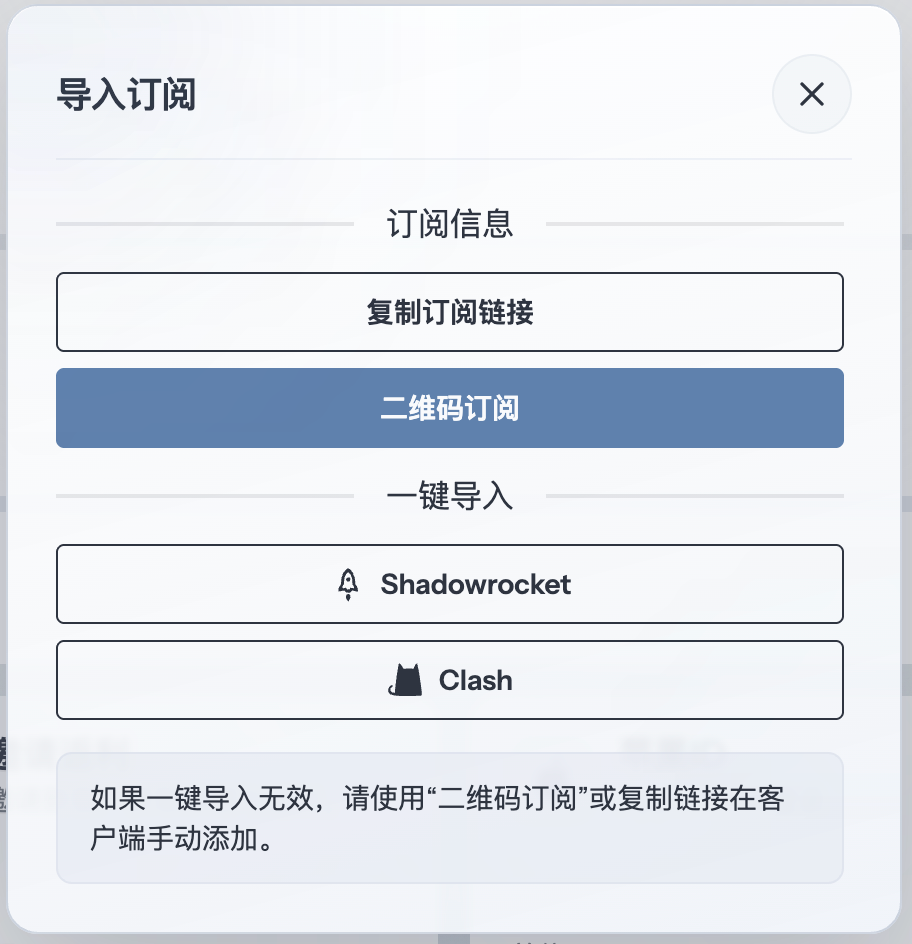
Copy the URL for a Clash/Mihomo YAML configuration from your provider's dashboard. Using 畅连 as an example, open the subscription import window and click “复制订阅链接” (Copy subscription link).
Step 03Add a subscription
Tap 我的配置 (My Profiles) → + → 添加配置链接 (Add Profile Link).
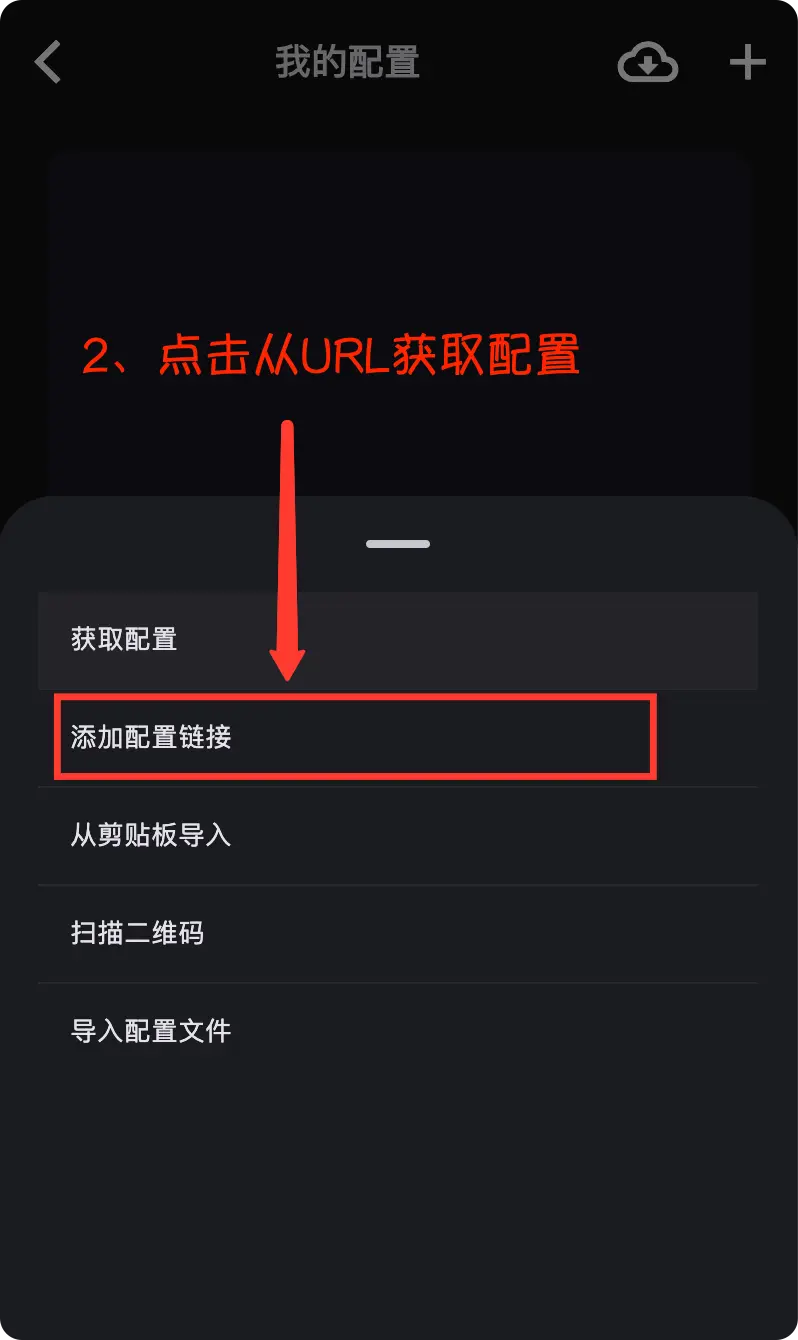
Use a complete Clash/Mihomo YAML configuration URL, not the provider’s login page or an individual node sharing link.
Step 04Save the profile
Paste the full URL into 配置链接/内容 (Configuration Link / Content) → enter a name in 备注 (Remark) → tap the checkmark at the top right. Return to 我的配置 (My Profiles) and select the downloaded profile as the current one.
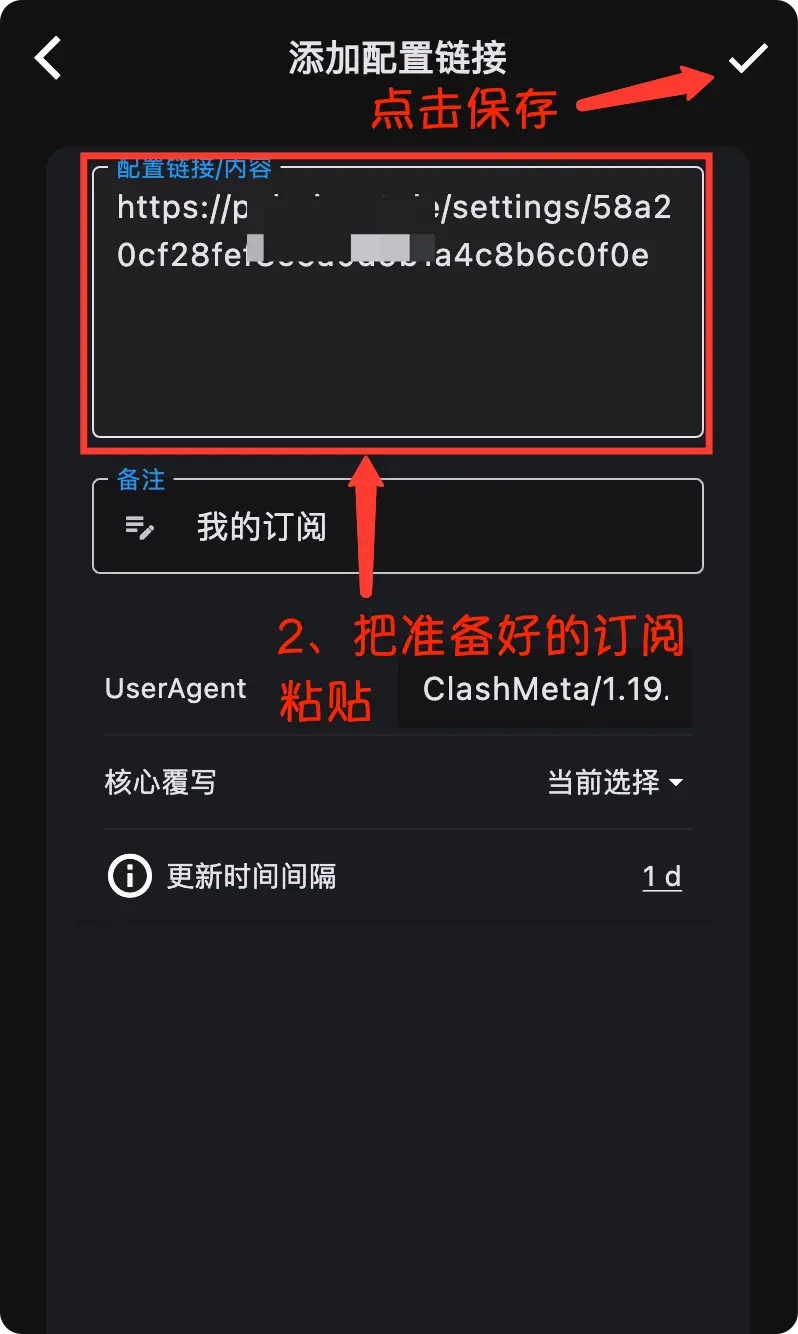
If downloading or YAML parsing fails, check that the URL is complete and returns a valid configuration, then add it again.
Step 05Select a node
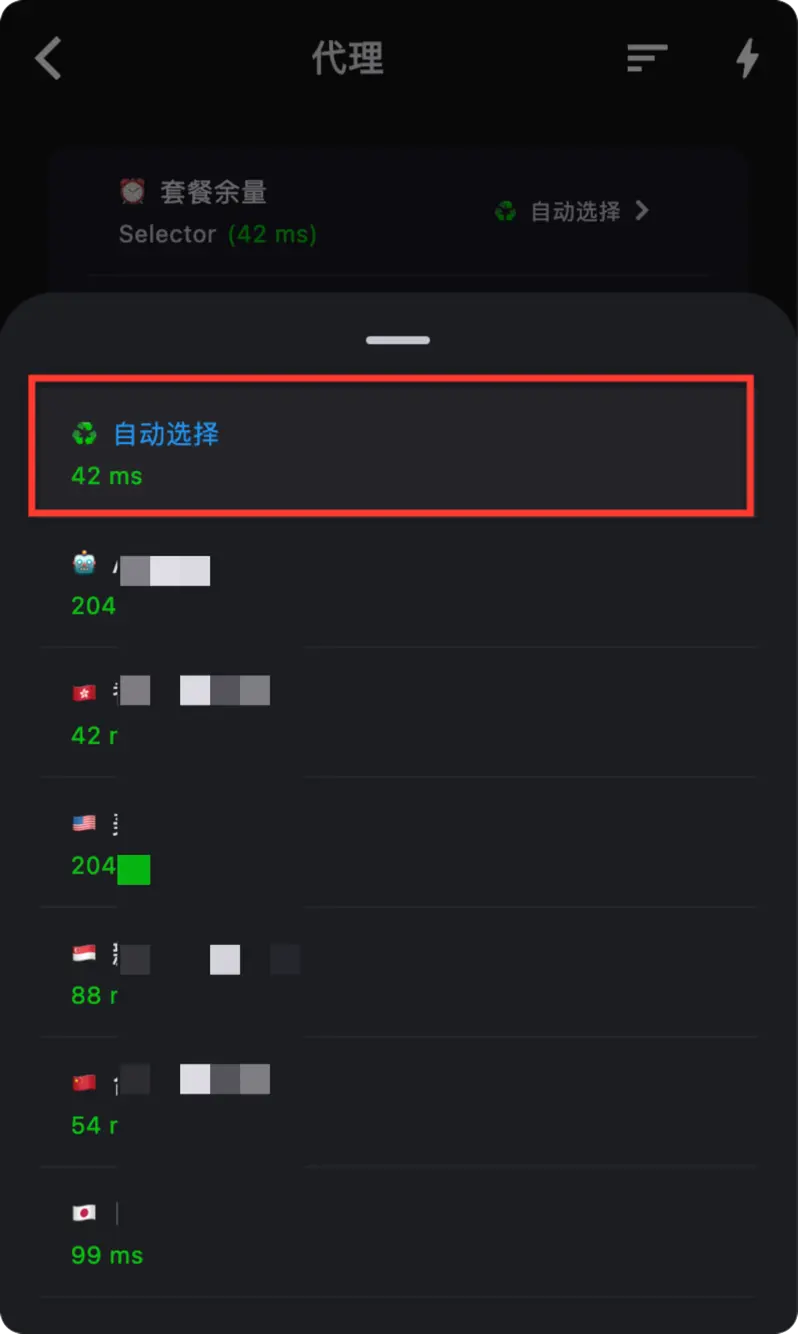
On the home screen, select 规则 (Rule) → open 代理 (Proxy) → expand a policy group and choose a working node. Keep automatic policies as configured. If the list is empty, return to the profile list and confirm that the newly imported profile is selected.
Step 06Start the connection
Turn off other VPNs, then turn on the home-screen connection switch.
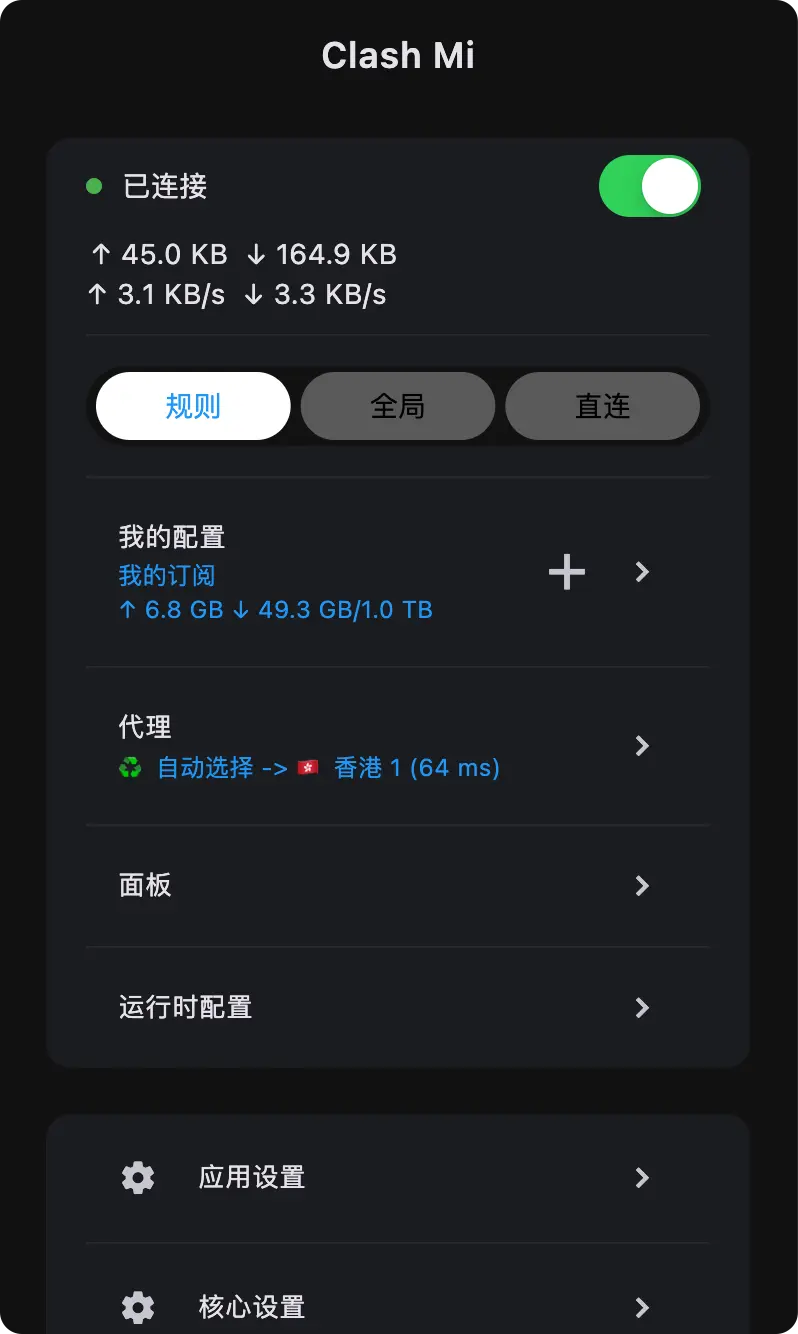
iOS / iPadOS: Allow the Clash Mi VPN configuration and complete device authentication.
Android: Accept the system VPN connection request. If it disconnects in the background, check battery optimization and background restrictions. If you denied permission, return to the app and try again.
Step 07Check the connection
First open a website you can normally access without a proxy, then one that requires a proxy. Next, check traffic and 核心日志 (Core Log). If access fails, try a working node, then check the configuration and DNS. Remove subscription URLs and credentials before sharing logs.
To stop using the proxy, turn off the connection and check that your original network works.
Step 08Proxy modes explained
Choose a mode on the home screen:
规则 (Rule): Follow the current YAML rules to select a proxy group, direct access or rejection.
全局 (Global): Skip routing rules and use the GLOBAL group. Open 代理 (Proxy) or 面板 (Dashboard) to select a working node or automatic policy. Selecting DIRECT still connects directly.
直连 (Direct): Connect to the destination without a proxy node.
Select a valid profile, turn on the connection and allow VPN access. Modes apply only to requests passed to the app. Return to 规则 (Rule) after troubleshooting.