

Step 01Download and install
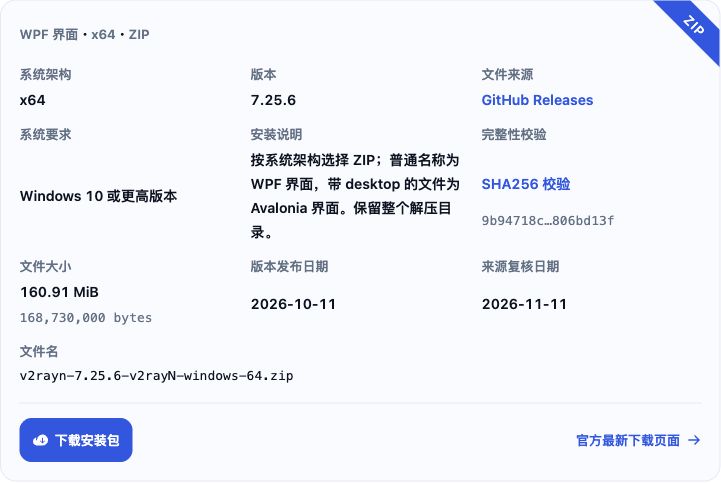
Windows: Open this site’s download page and choose the ZIP for your device architecture. Extract all files, then run v2rayN.exe in the extracted folder.
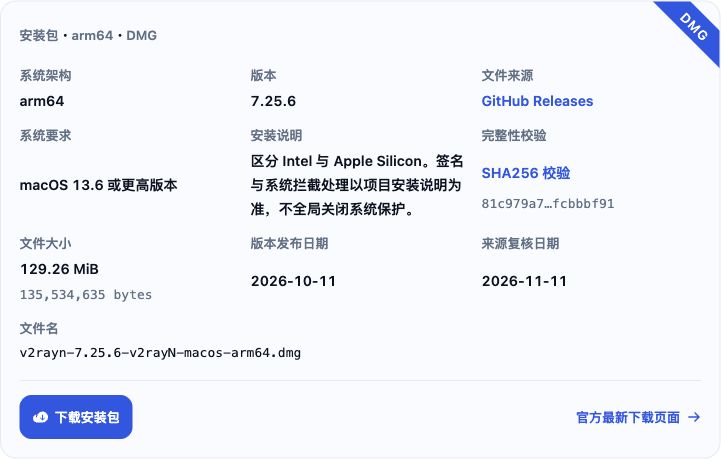
macOS: Open this site’s download page and choose the DMG for Intel or Apple Silicon. Open the DMG, install v2rayN in Applications, then launch it.
Installation note: If the app is reported as damaged or cannot be opened, confirm the package source, open Terminal, run xattr -cr /Applications/v2rayN.app, then relaunch v2rayN.
Step 02Get a subscription
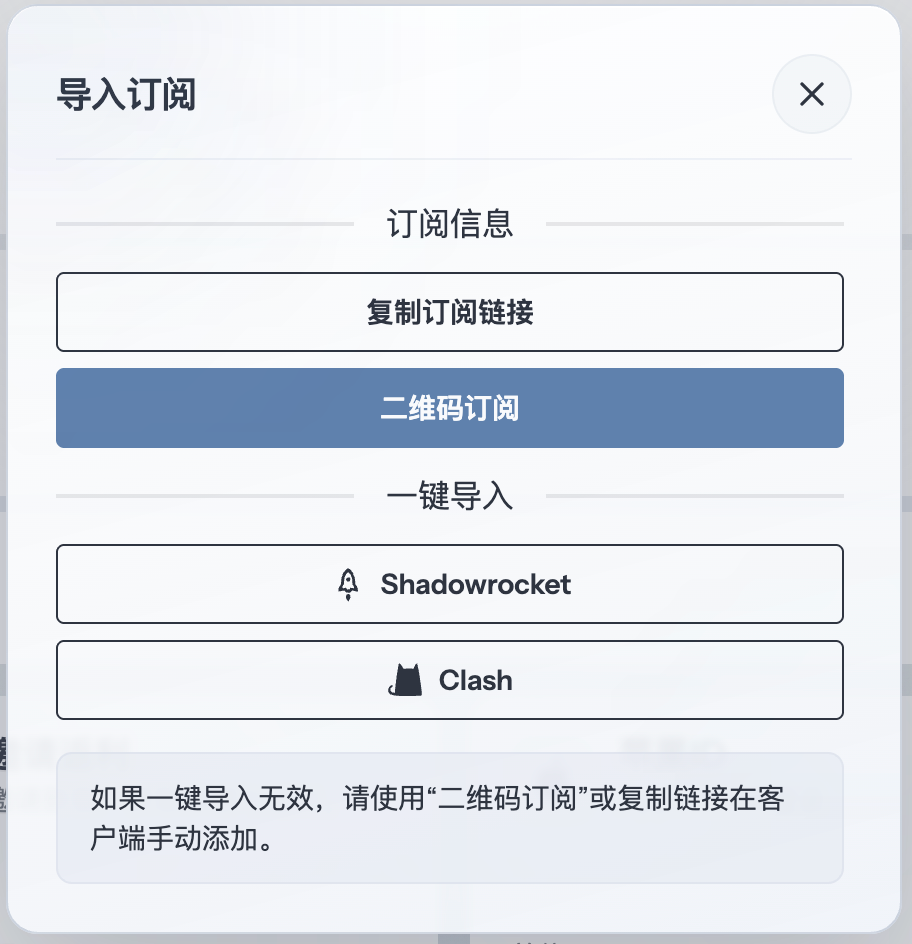
Nodes are essential for proxy access. Import them before using v2rayN. Adding a subscription by URL is the recommended, widely used approach: it is easy to set up, manage and update. Using 畅连 as the example, copy the subscription address as shown below.
Step 03Add a subscription
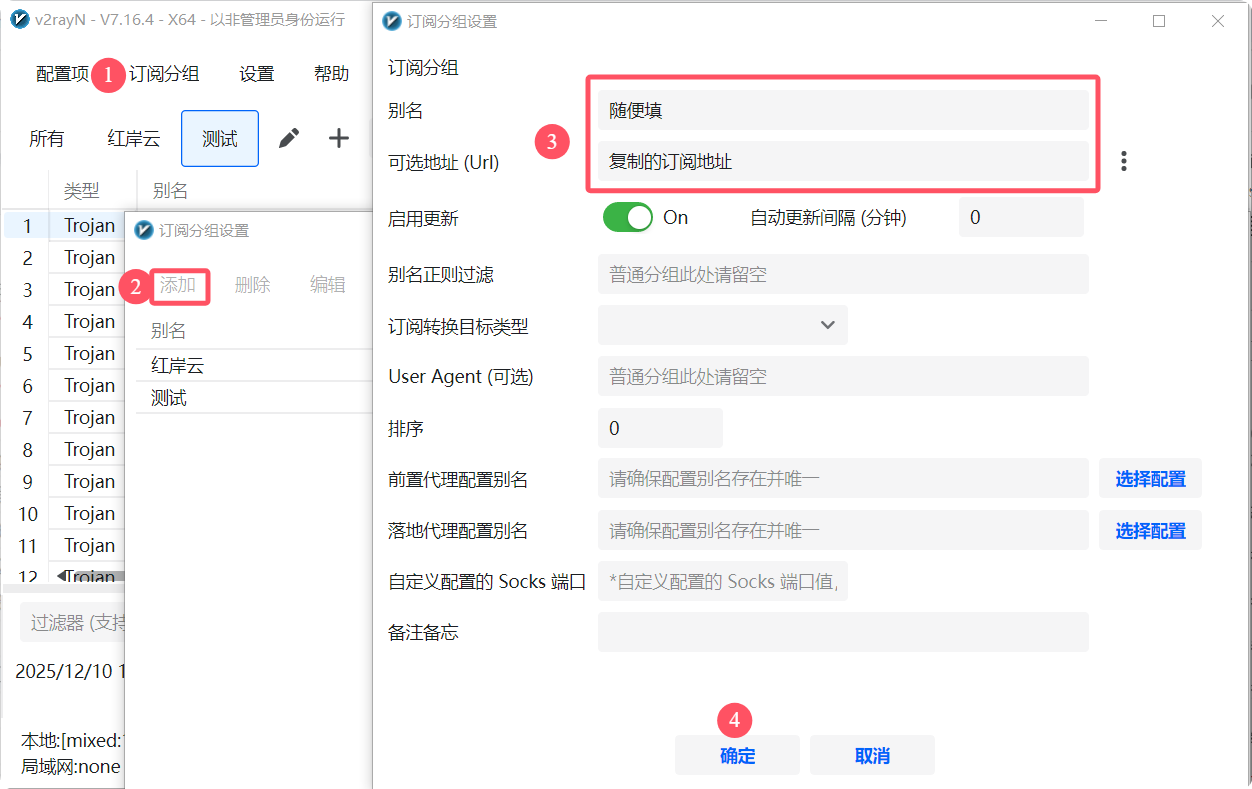
Use either method below; add the subscription only once. First method: Open v2rayN → click + → enter any name in 别名 (Remarks) → paste the subscription address into 可选地址 (Url) (URL (optional)) → click 确定 (Confirm), as shown below.
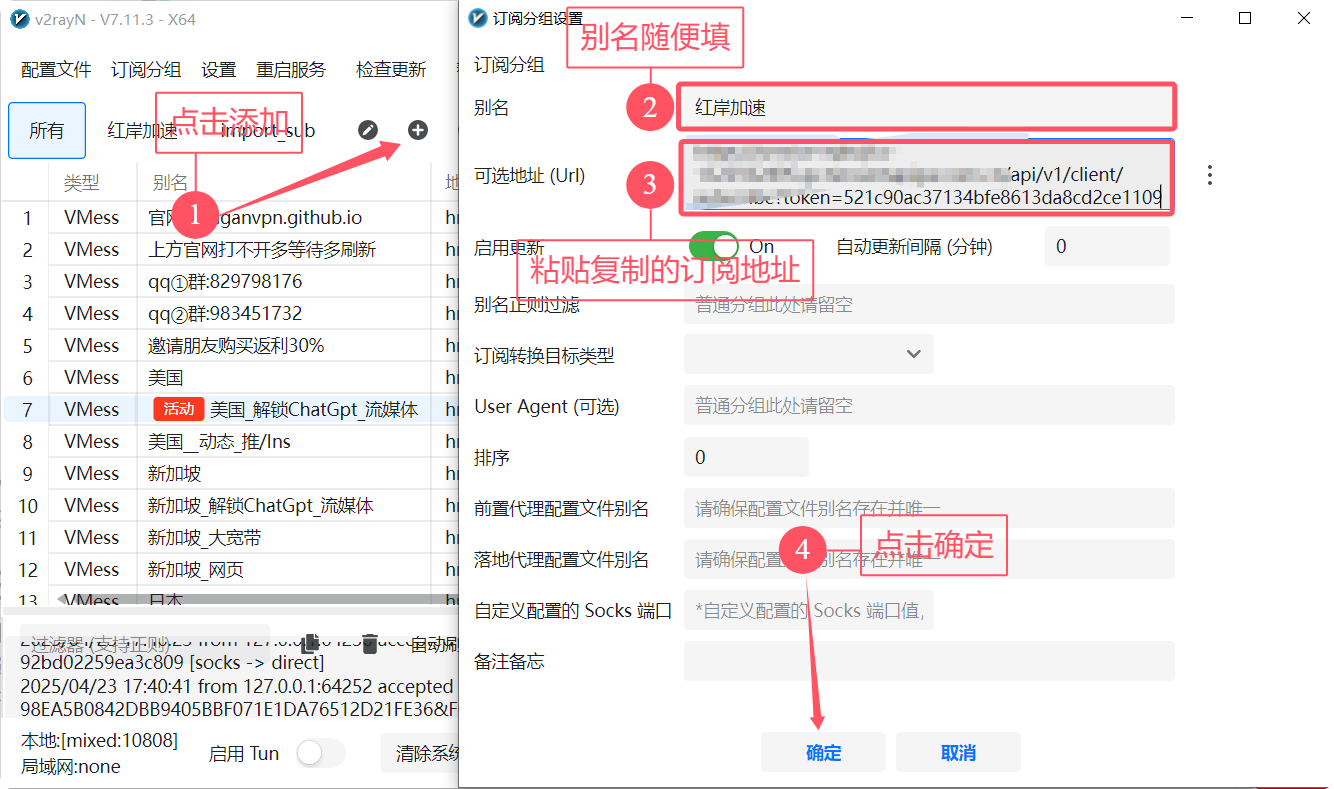
Second method: Click 订阅分组 (Subscription Group) → 订阅分组设置 (Subscription group settings) → 添加 (Add) → enter any name in 别名 (Remarks) → paste the subscription address into 可选地址 (Url) (URL (optional)) → click 确定 (Confirm), as shown below.
Step 04Update subscriptions
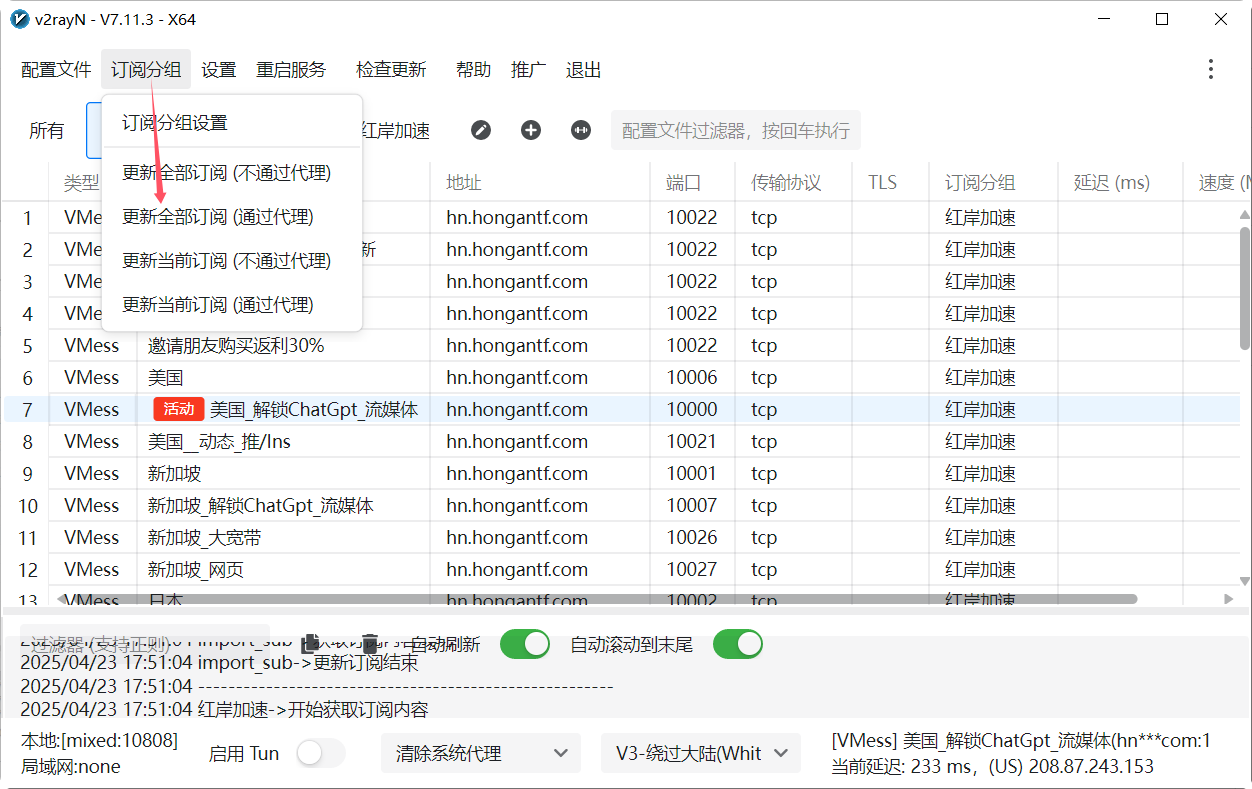
Open 订阅分组 (Subscription Group) → 更新全部订阅 (不通过代理) (Update all subscriptions without proxy). The node list appears after a successful download. If you already have a working node and need to update through it, you can instead choose 更新全部订阅 (通过代理) (Update all subscriptions through proxy).
Step 05Select a node
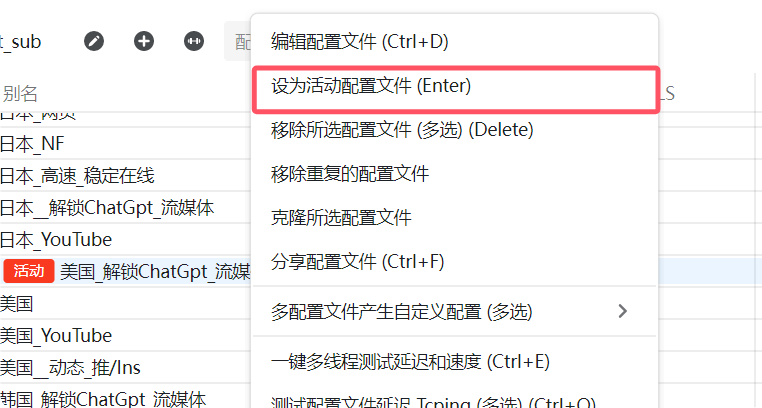
Right-click a node and choose “设为活动配置文件 (Set as active)”. Shortcut: left-click the node and press Enter.
Step 06Set up the proxy
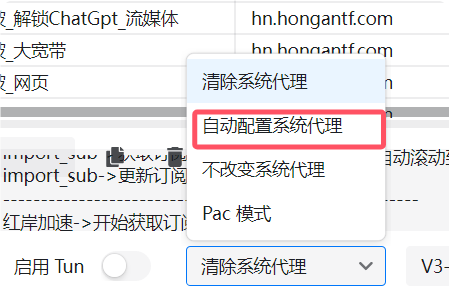
Switch from “清除系统代理 (Clear system proxy)” to “自动配置系统代理 (Set system proxy)”. Apps that follow the system proxy send requests to the v2rayN core. Its routing rules select the actual outbound: proxy, direct or blocked. Then use your usual browser to open a site you can normally access directly, followed by one that needs the proxy. If it fails, try another node.
Step 07Proxy modes explained
“清除系统代理 (Clear system proxy)”: Remove the operating system’s proxy settings whenever the service starts or restarts.
“自动配置系统代理 (Set system proxy)”: Set the OS proxy whenever the service starts or restarts so apps that honor it send requests to the core. Core routing still selects the outbound; this is not global proxying or a VPN/TUN mode.
“不改变系统代理 (Do not change system proxy)”: Leave the OS proxy unchanged at service start or restart, including settings made by other apps. Clearing or leaving the system proxy unchanged does not mean stopping the core or disabling an active TUN mode.
“Pac 模式 (PAC mode)”: On service start or restart, set Windows to use a PAC auto-configuration script. Apps that honor this setting follow the script: DIRECT connects directly; PROXY sends requests to the core, whose routing rules then select the outbound. Apps that ignore the system proxy are not captured by PAC, and PAC is not a VPN/TUN mode.