

Step 01Download and install
Before installing, confirm that the main router and its clients have internet access and record the original gateway and DNS. Optional: export a system configuration backup in LuCI for restoring the original settings.
Open this site’s download page: choose IPK for opkg or OpenWrt APK for apk. Extract the .ipk from this site’s ZIP; use the same page’s official link for other packages.
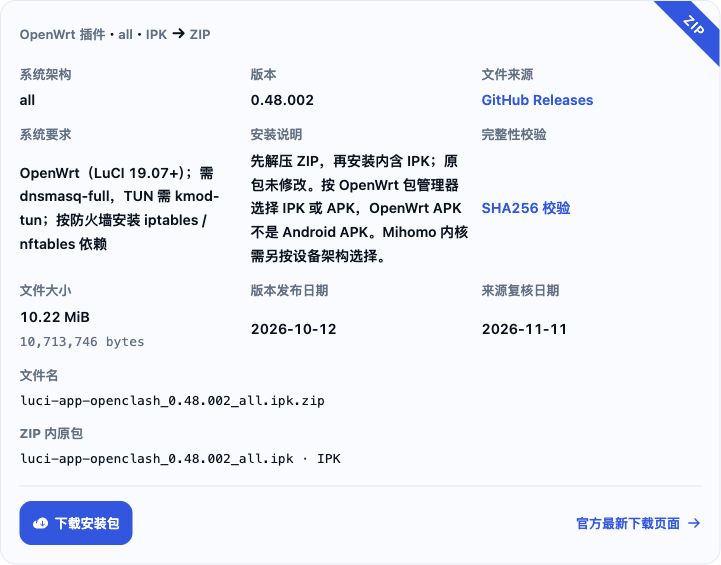
Log in to the router over SSH as root. Install the base dependencies using the firmware’s package manager. For opkg, run these in order:opkg updateopkg install bash dnsmasq-full curl ca-bundle ip-full ruby ruby-yaml kmod-tun kmod-inet-diag unzip luci-compat luci luci-base
For apk firmware, run these in order:apk updateapk add bash dnsmasq-full curl ca-bundle ip-full ruby ruby-yaml kmod-tun kmod-inet-diag unzip luci-compat luci luci-base
Then run the one command matching the firmware’s actual firewall and package manager:
Firewall4 / nftables, opkg: opkg install kmod-nft-tproxy
Firewall4 / nftables, apk: apk add kmod-nft-tproxy
iptables, opkg: opkg install iptables ipset iptables-mod-tproxy iptables-mod-extra
iptables, apk: apk add iptables ipset iptables-mod-tproxy iptables-mod-extra
Additional source: official dependency guide.
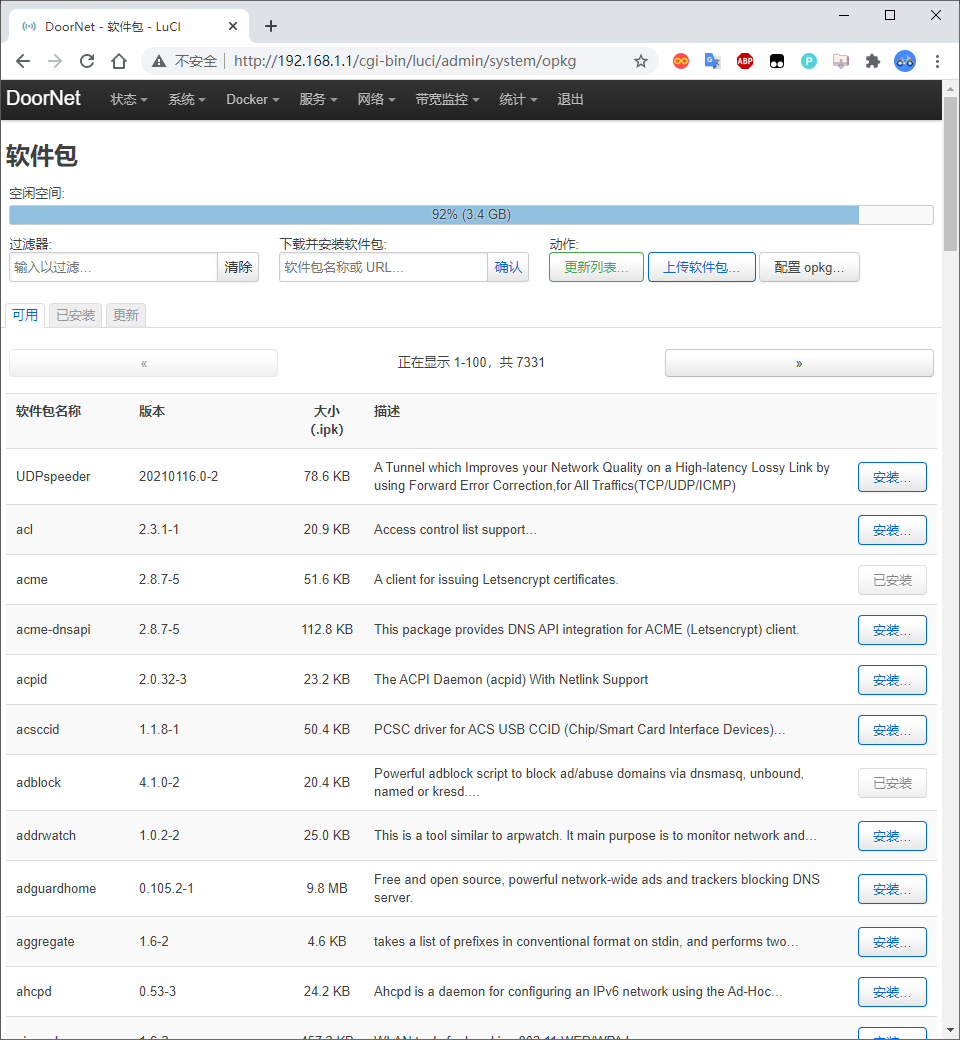
After installing the dependencies, open LuCI 系统 (System) → 软件包 (Software) → 上传软件包... (Upload package), choose the extracted .ipk and confirm installation. Do not upload the ZIP.
OpenWrt APK is not an Android package. Web installation depends on firmware and signature trust. Use SCP to upload an APK confirmed to come from the official Release to the router, saving it as /tmp/openclash.apk, then run apk add /tmp/openclash.apk as root. If UNTRUSTED signature appears, verify the official Release source, then run this version’s official local-package installation command:apk add -q --force-overwrite --clean-protected --allow-untrusted /tmp/openclash.apk
Additional source: official APK command-line installation steps. Stop on space or dependency errors; resolve them before installing.
Step 02Get the core
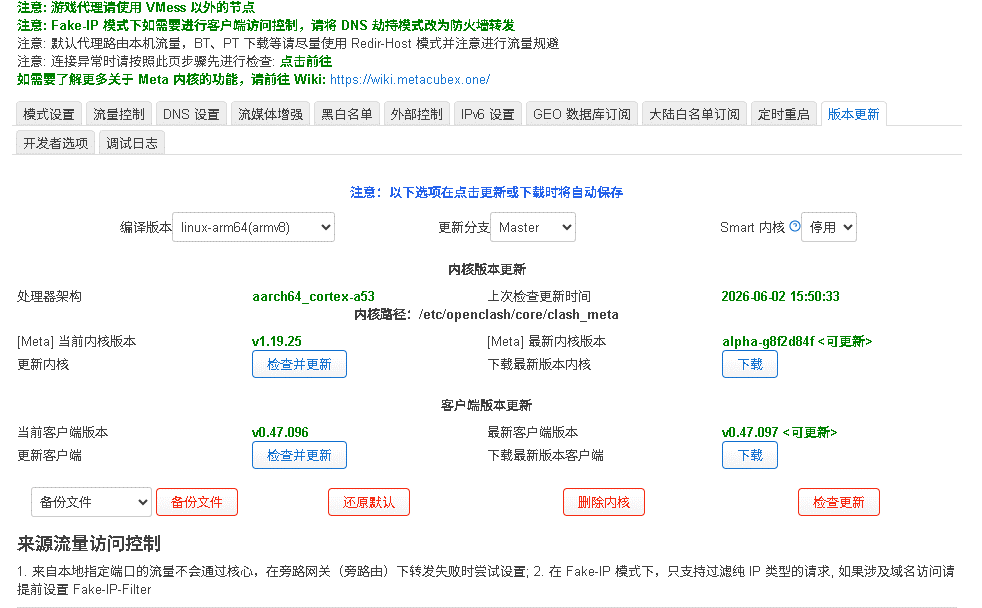
Sign in to LuCI again → 服务 (Services) → OpenClash → 插件设置 (Plugin settings) → 版本更新 (Version update). Check the CPU architecture and select the core build matching your CPU, endianness and firmware under 编译版本 (Compiled version).
The image shows the historical 0.47.096 interface: click 检查并更新 (Check and update) under 内核版本更新 (Core version update). In the newer list, click the version in the 内核 (Core) column to update only the core; do not click the address to update the plugin too.
Optional manual upload if automatic downloading fails: 配置管理 (Configuration management) → 上传文件类型 (Upload file type) → [Meta] 内核文件(.tar.gz) (Core file) → choose the official CPU-matched .tar.gz core archive → 上传 (Upload). Do not rename .gz as a substitute or select a configuration/backup file type.
Step 03Get a subscription
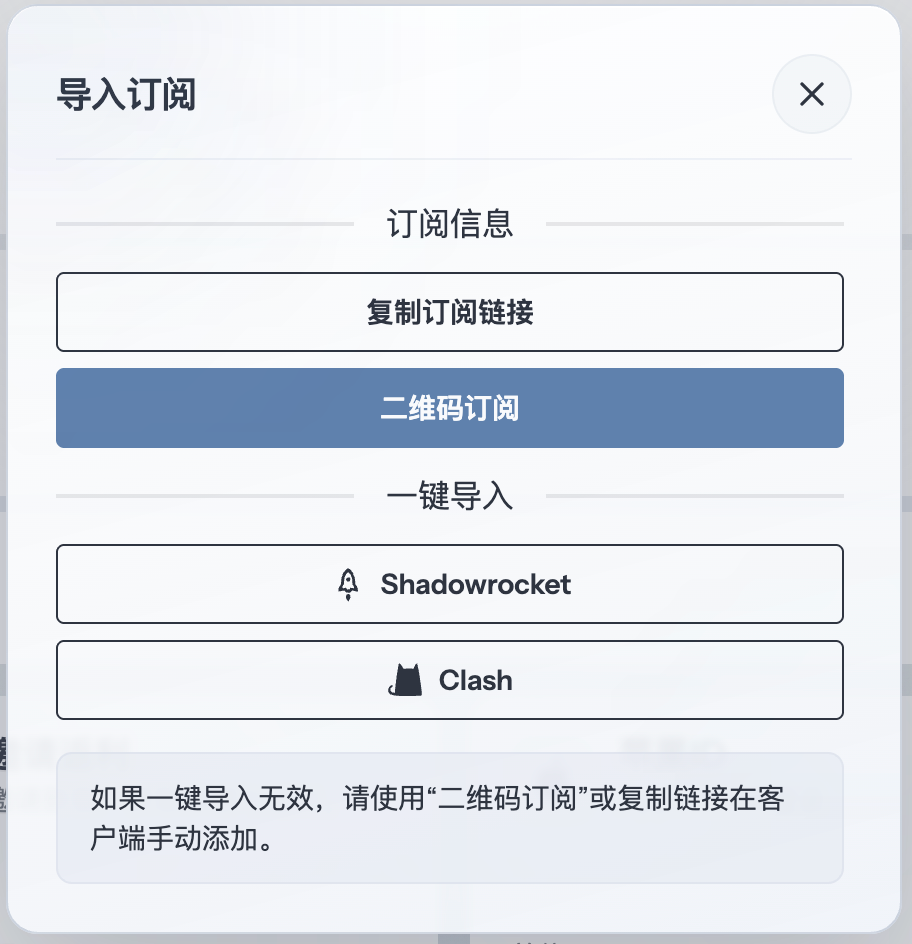
Copy the URL for a Clash/Mihomo YAML configuration from your provider's dashboard. Using 畅连 as an example, open the subscription import window and click “复制订阅链接” (Copy subscription link).
Step 04Add a subscription
Open 配置订阅 (Configuration subscriptions) → 添加 (Add). Enter a recognizable name in 配置文件名 (Configuration filename) and paste the full Clash / Mihomo YAML configuration URL into 订阅地址 (Subscription URL).
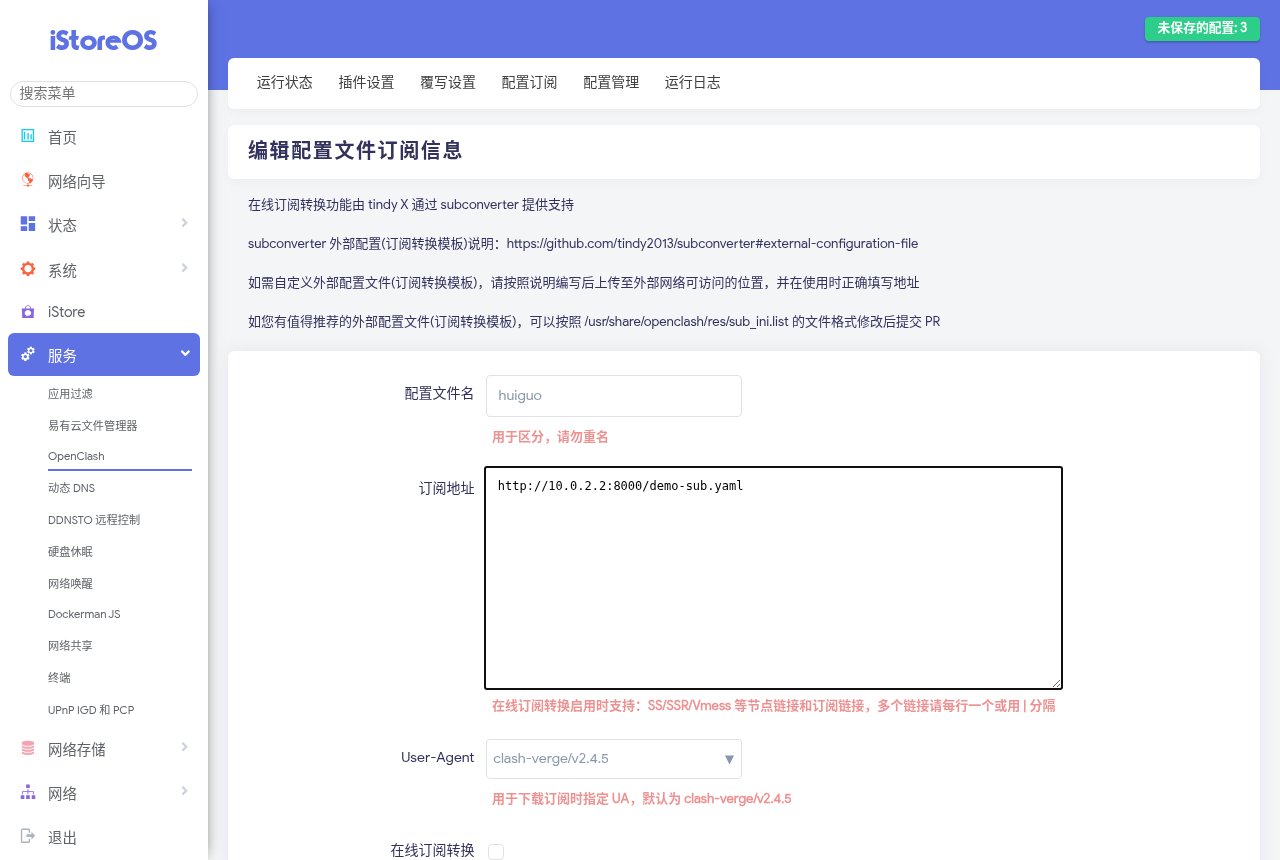
Click 保存配置 (Save configuration) at the bottom of the page. Back in the list, make sure the subscription is enabled and click 更新 (Update) on its row. Wait for the configuration download to finish.
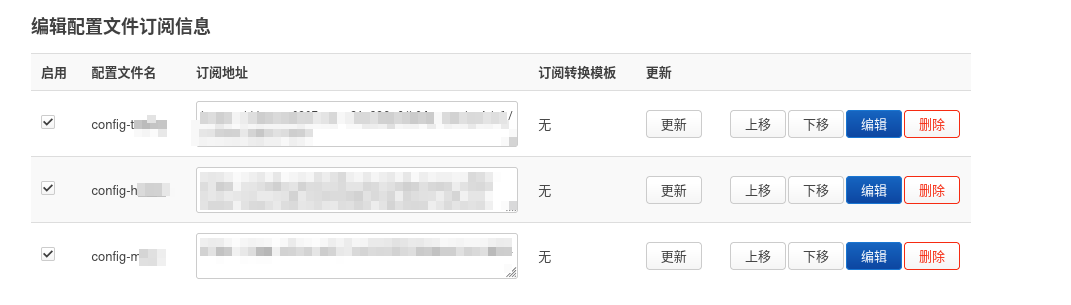
Step 05Select the profile and start
Open 配置管理 (Configuration management) → 配置文件列表 (Configuration file list). Find the downloaded YAML and click 切换 (Switch) on its row to make it the current profile. If you already have a local YAML file, upload it in Configuration management before switching.
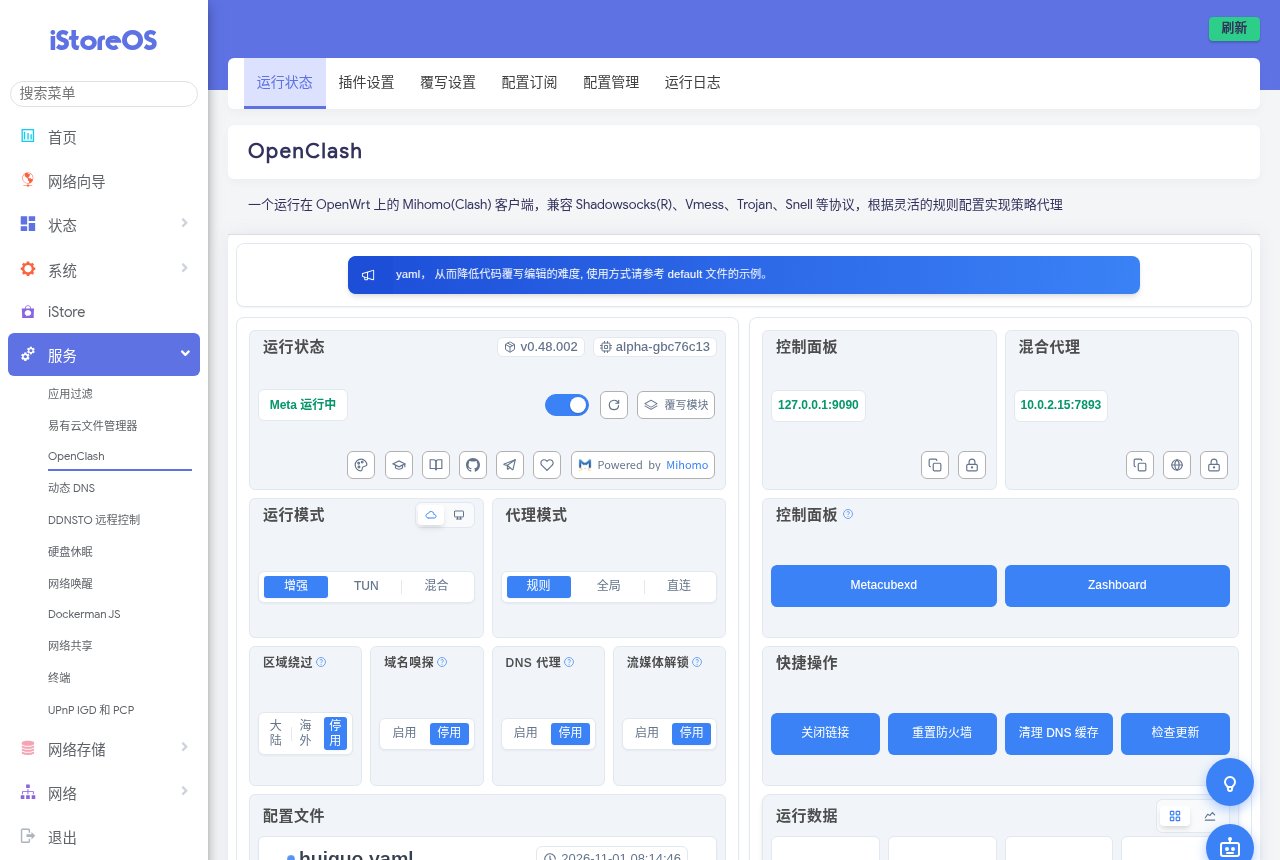
Return to 运行状态 (Running status), set 代理模式 (Proxy mode) to 规则 (Rule), and turn on the plugin switch in the running-status card. Wait for the core to show that it is running before continuing. If startup fails, open 运行日志 (Running log) and check the first error.
Step 06Choose a server and check the connection
In 运行状态 (Running status), open Zashboard in the 控制面板 (Dashboard) section → 代理 (Proxies). Expand a policy group and select a working server, or keep the automatic policy from your configuration. The selected item has a highlighted background.
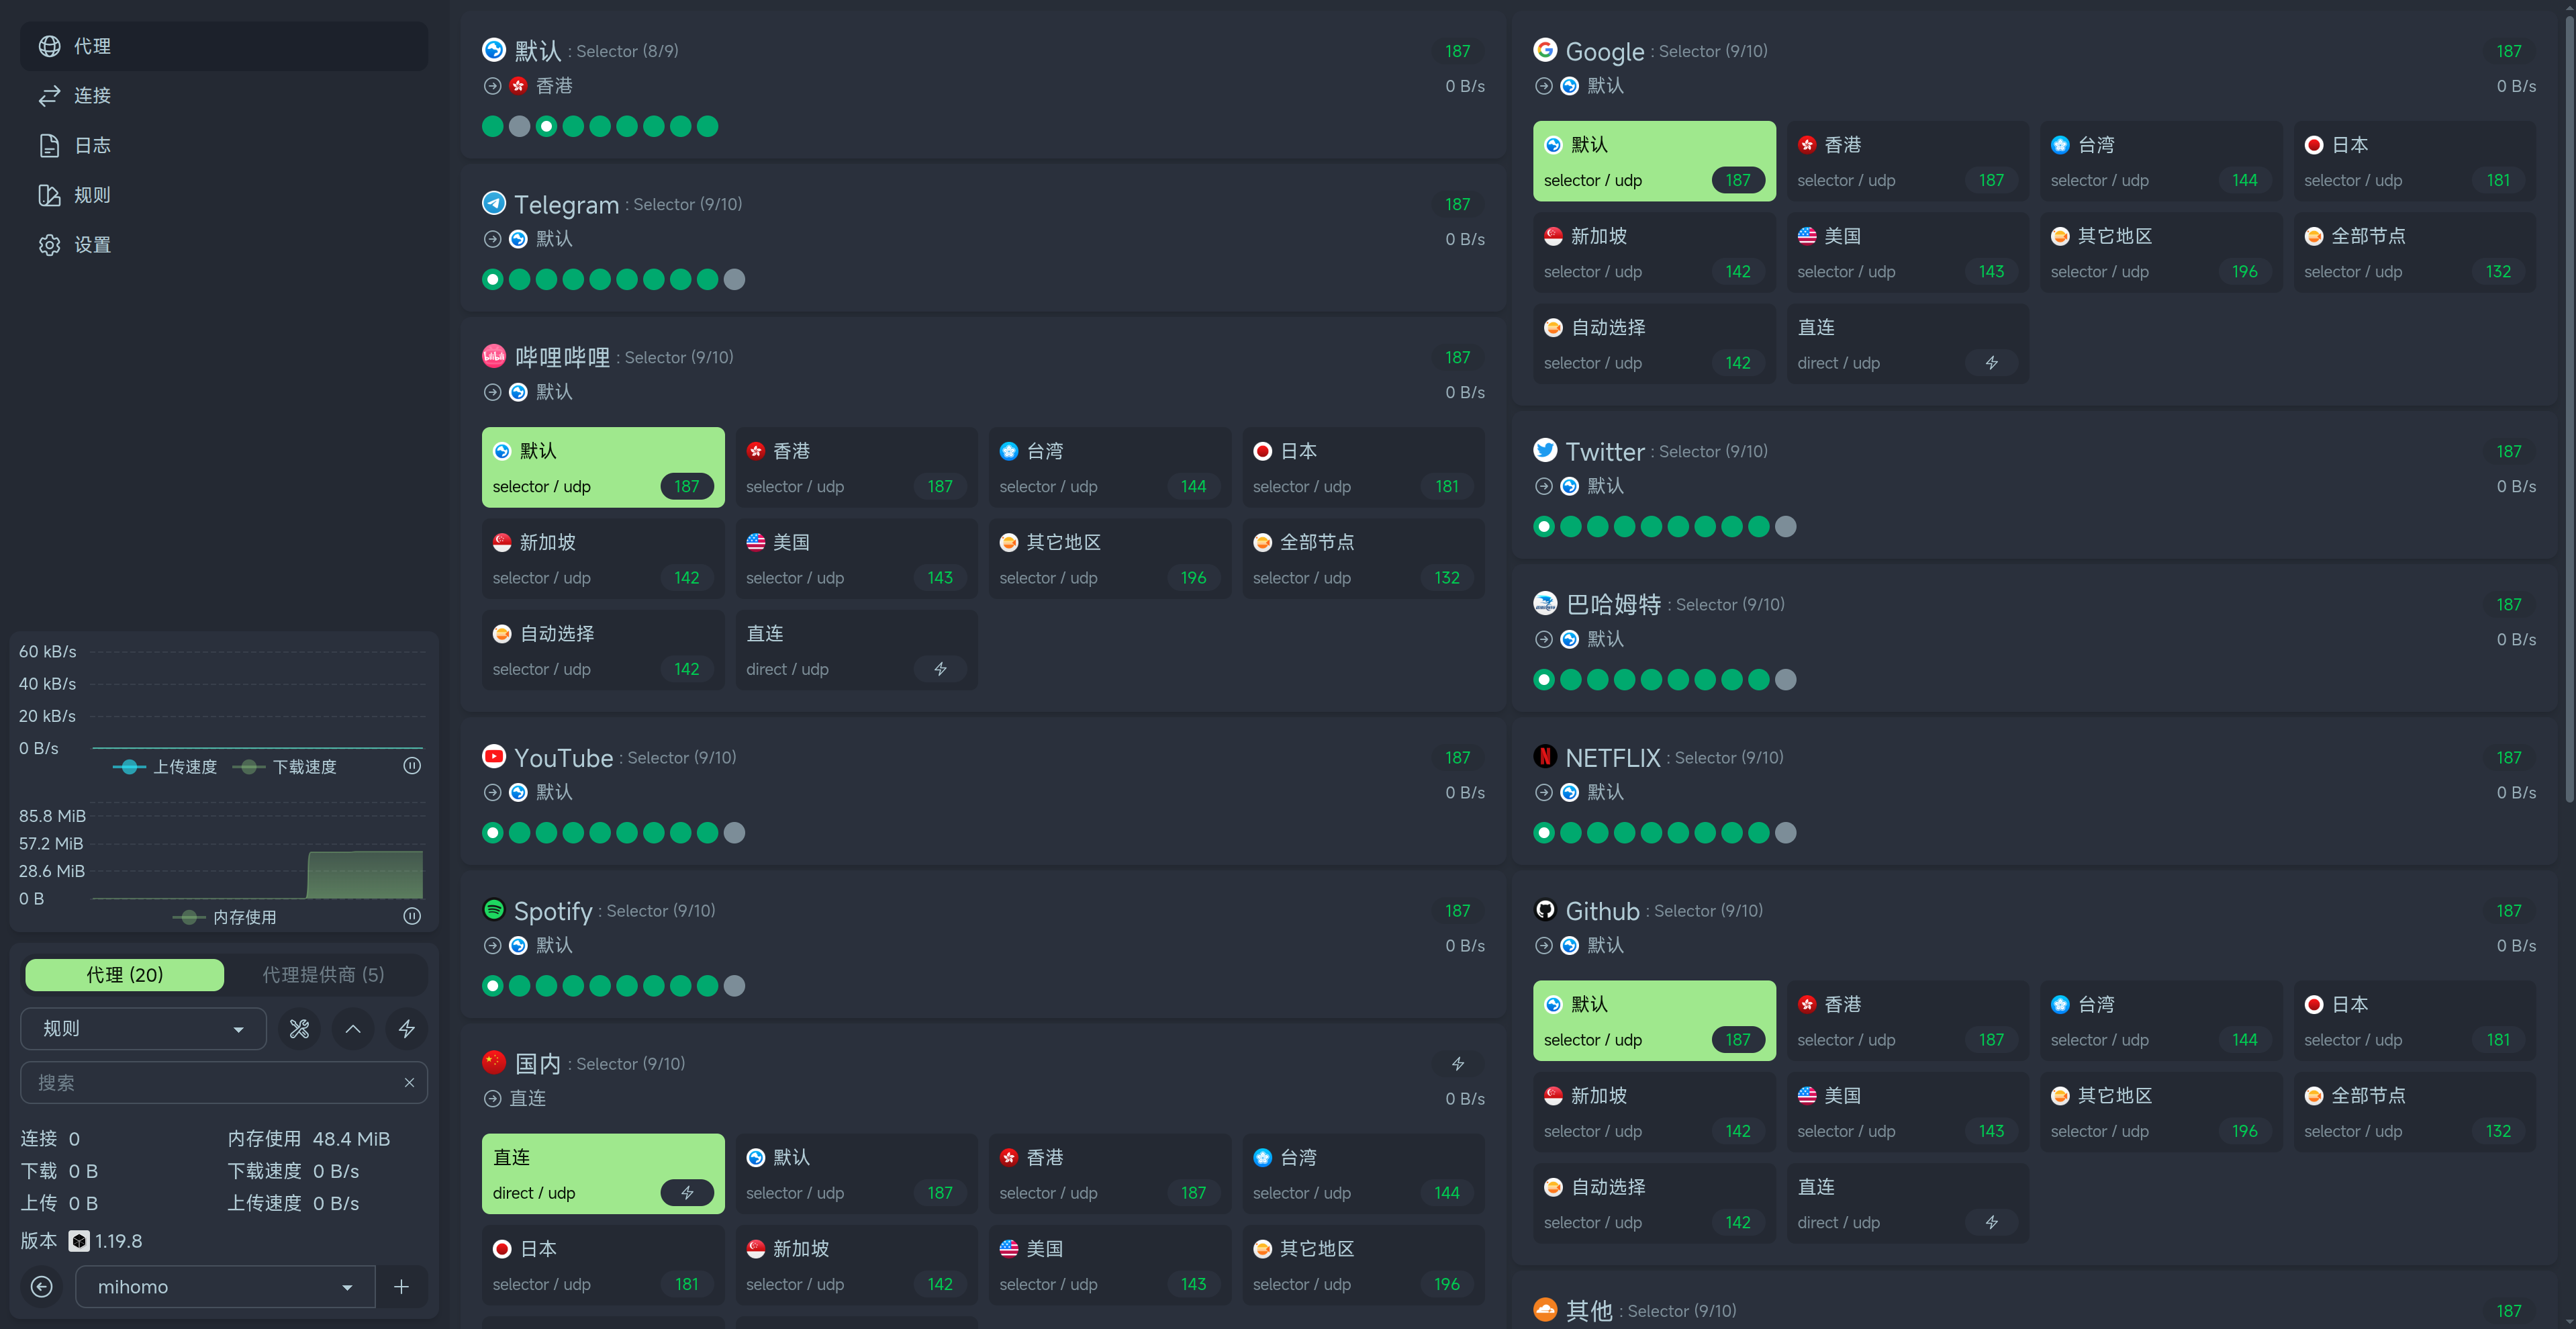
Test one computer first: check the gateway and DNS supplied by the main router, then open a site you normally access directly, a site that needs the proxy, and the router-admin page. Open 连接 (Connections) in Zashboard to check matched rules and proxy chains. Test other devices once this computer works and the core is not repeatedly restarting.
Step 07Disable and restore
When you want to stop using OpenClash or restore the original network, 运行状态 (Running status) → turn off the plugin switch → wait for it to stop. Restore any manually changed gateway or DNS from your pre-installation record, then test direct internet and router-admin access. If IPs work but names fail, check DNS. If the router works but clients fail, check DHCP and forwarding.
Step 08Proxy modes explained
These modes handle requests already inside Mihomo. Client gateway, DNS and firewall forwarding must still be set correctly.
规则 (Rule): Choose a server in the policy group, then use this mode for everyday rule-based routing.
全局 (Global): Uses the policy selected in GLOBAL without matching individual rules. Selecting DIRECT still connects directly.
直连 (Direct): Sends captured requests directly while the plugin keeps running. Return to the working mode after troubleshooting.
Fake-IP and Redir-Host are DNS-related runtime modes. TUN and hybrid variants concern traffic capture, not global proxy mode. Keep a working runtime mode; after changes, clear client DNS caches if needed and test one device. Traffic bypassed by access control stays outside these routing modes.