

Step 01Download and install
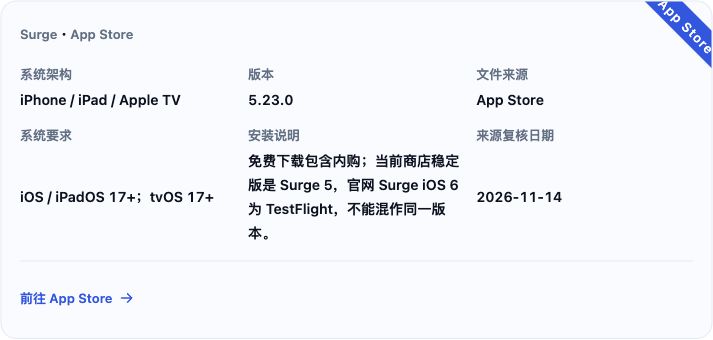
Open this site’s download page → iOS → App Store and install the stable Surge release. Open the app to check your license, prepare a complete Surge profile URL and stop other VPNs.
Step 02Get a subscription
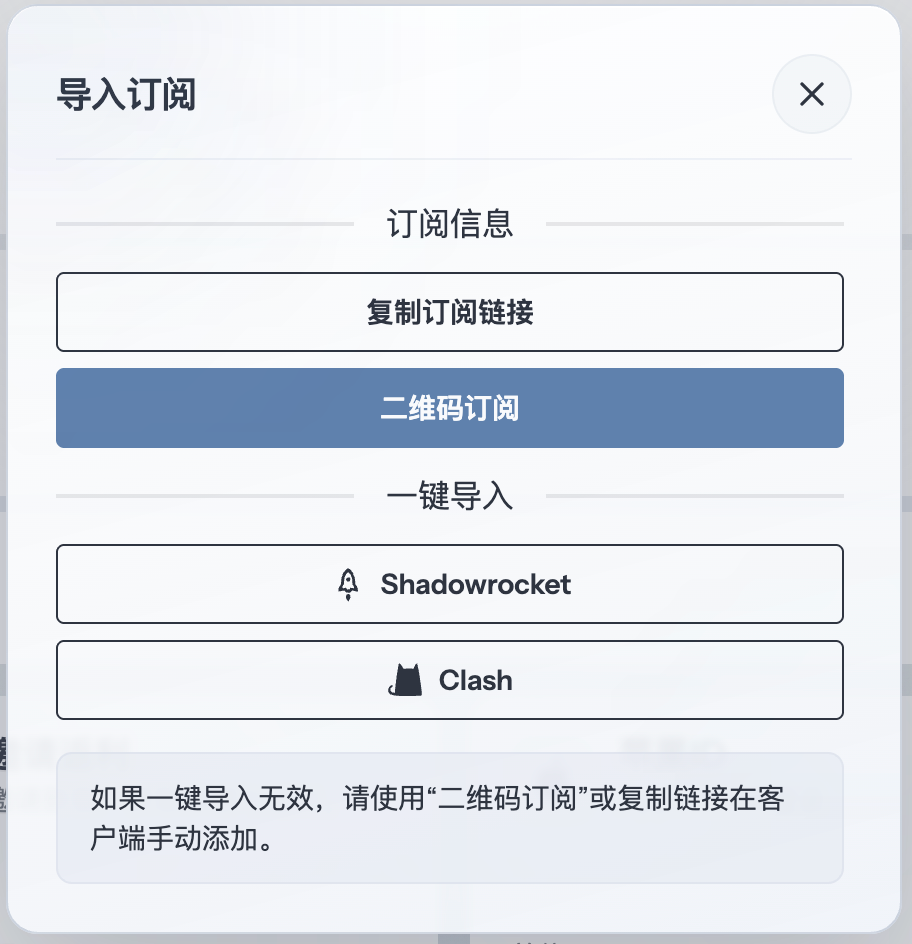
Copy the URL for a complete Surge configuration from your provider's dashboard. Using 畅连 as an example, open the subscription import window and click “复制订阅链接” (Copy subscription link).
Step 03Add a profile
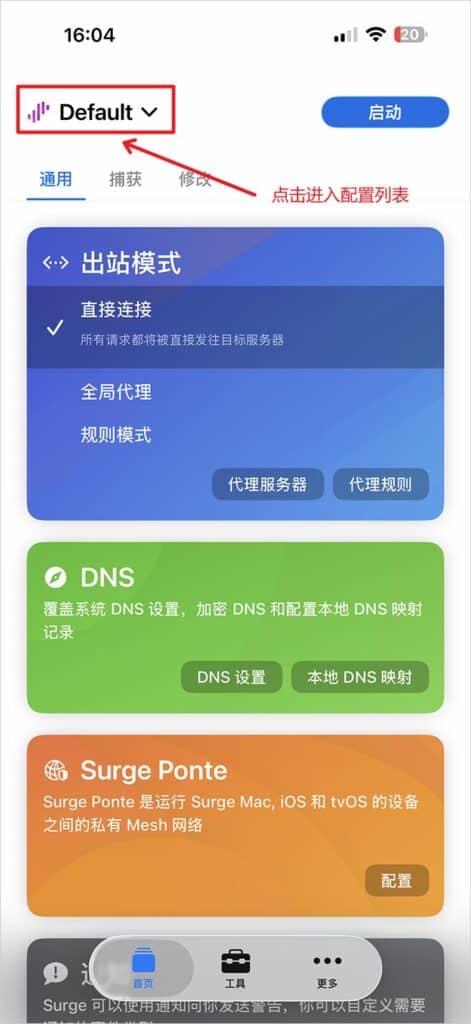
On 首页 (Home), tap the profile name at the top left, such as Default, to open 配置列表 (Profile List).
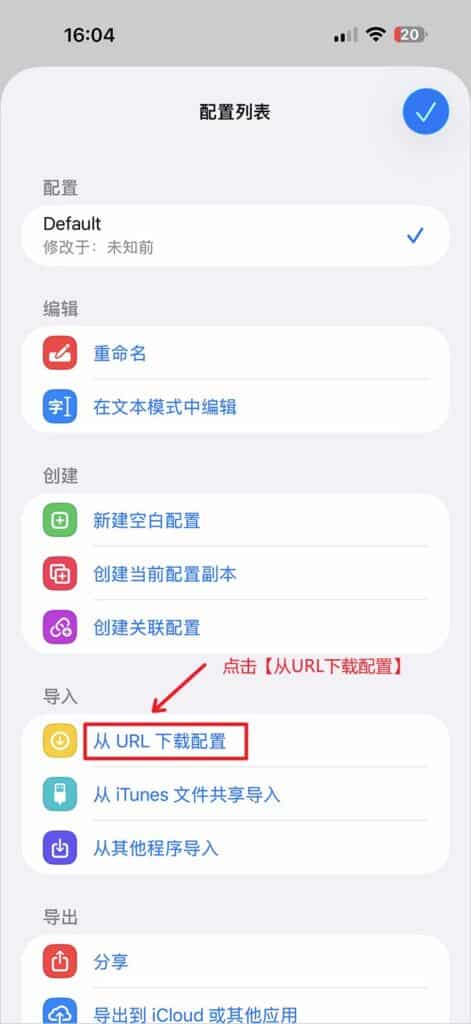
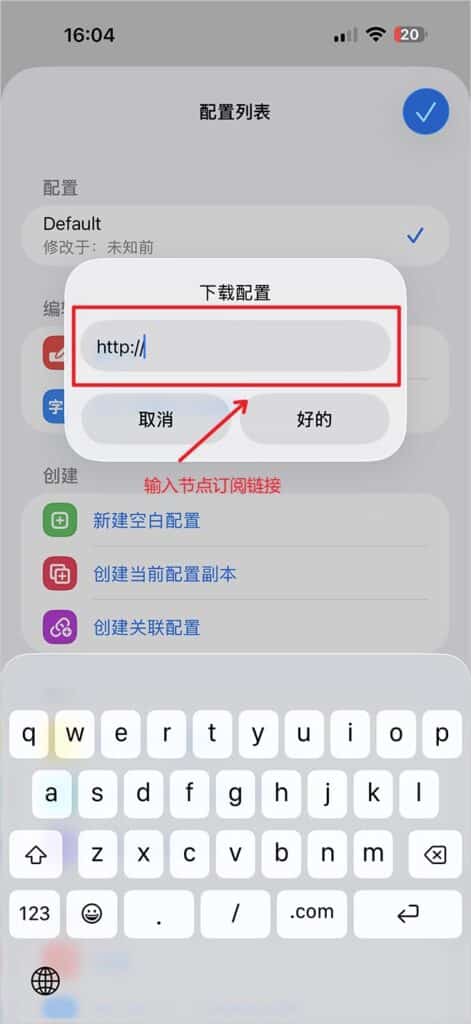
In the import section, tap 从 URL 下载配置 (Download Profile from URL).
Step 04Save the profile
In the 下载配置 (Download Profile) dialog, replace the prefilled text with the complete Surge profile URL and tap 好的 (OK).
After downloading, the new profile appears in 配置列表 (Profile List). The checkmark on its right shows that it is selected. To change its name, tap 重命名 (Rename) and enter a recognizable name.
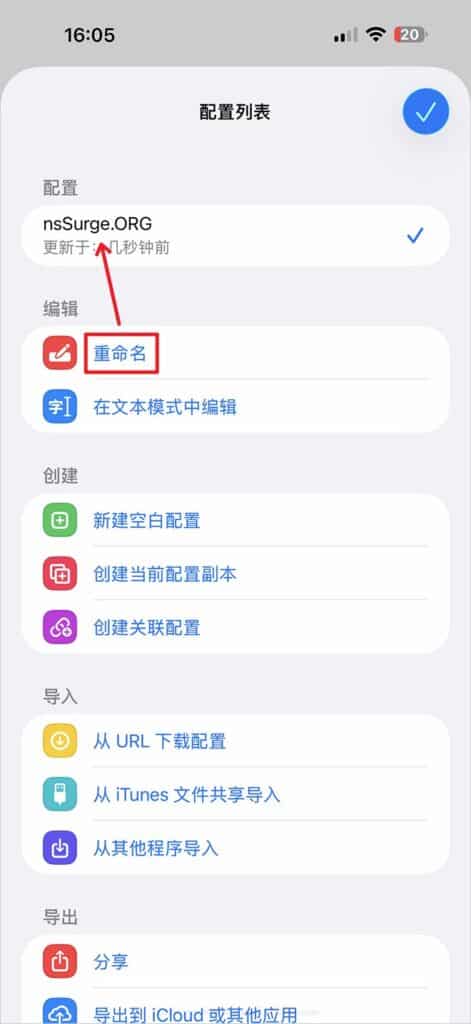
Confirm that this profile is selected, then tap the checkmark at the top right to return to Home.
Step 05Start the proxy
Return to 首页 (Home), confirm that the saved profile name appears at the top left and tap 启动 (Start) at the top right.
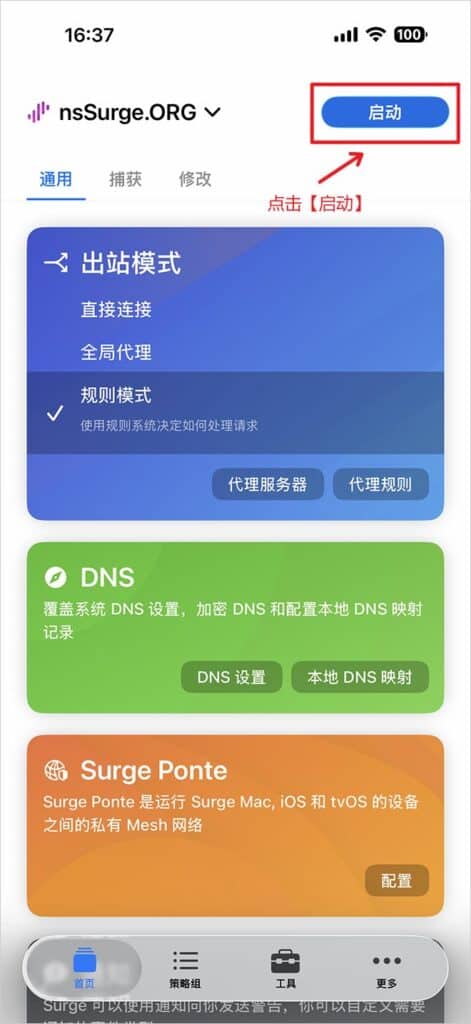
On first use, allow the Surge VPN configuration and complete device authentication when prompted, then return to the app to finish connecting.
Step 06Outbound modes
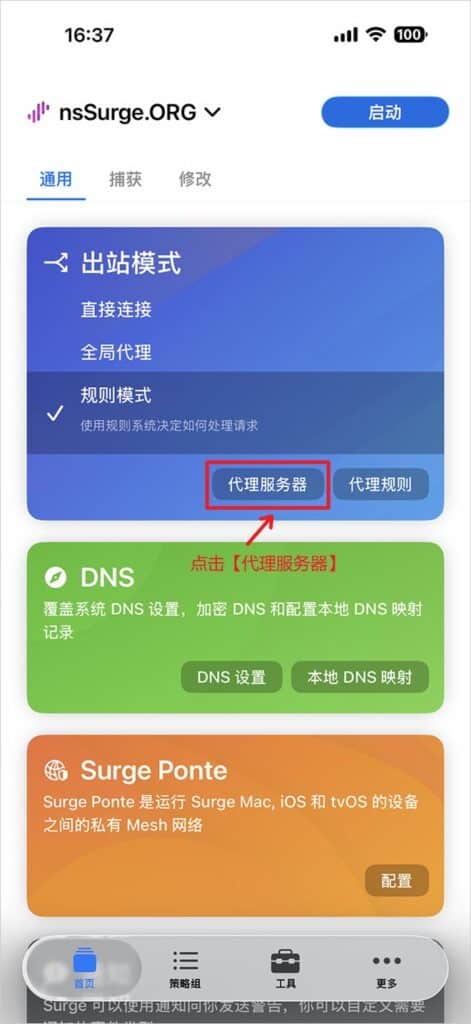
On 首页 (Home) → 通用 (General), find the 出站模式 (Outbound Mode) section and tap 规则模式 (Rule-Based Proxy).
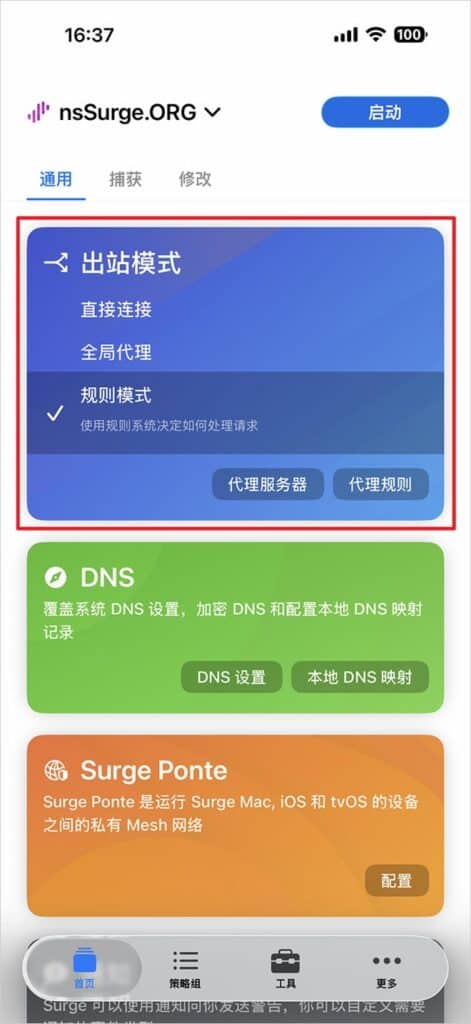
规则模式 (Rule-Based Proxy): Follow the current profile’s rules to choose a proxy, direct access or rejection.
全局代理 (Global Proxy): Skip routing rules, including FINAL, and use the selected global policy. Choose a working node or proxy group first; selecting DIRECT still means direct access.
直接连接 (Direct Outbound): Connect directly to the destination without a proxy node.
Modes apply only to requests captured by Surge. Start Surge and allow VPN access as well. Return to 规则模式 (Rule-Based Proxy) after troubleshooting.
Step 07Switch nodes
Tap 代理服务器 (Proxy Servers) in the 出站模式 (Outbound Mode) section.
On 策略组 (Policy Groups), tap a working node card in the required group and confirm that the current selection changes. Node and group names depend on your profile.
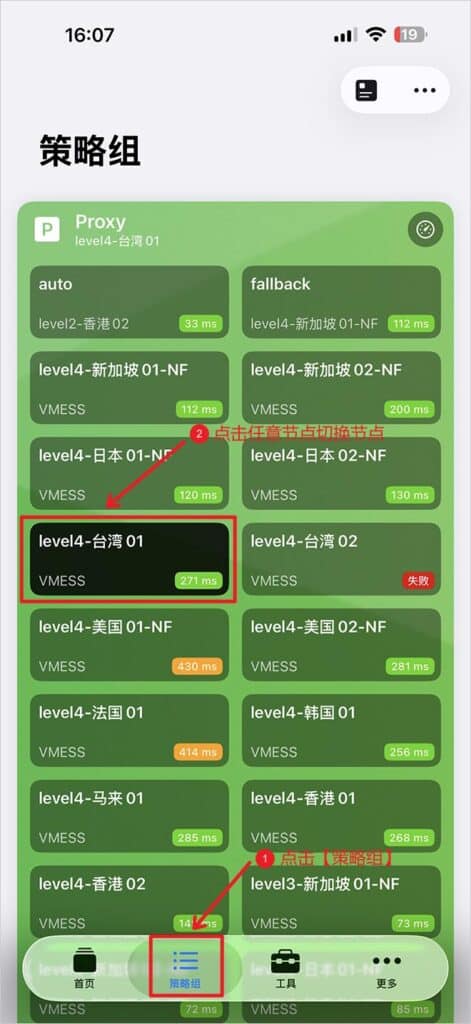
After switching, open a website you can normally access directly, then one that requires a proxy, to check the connection. When finished, return to Home to stop the proxy.